初试微信模板消息推送
背景介绍
最近有个需要是给用户推送微信模板消息,当订单发货时,提醒用户。周末在家,在Gitee上下载个demo,在本地环境做了运行,记录下来,方便备查。
第一步、申请微信接口测试号
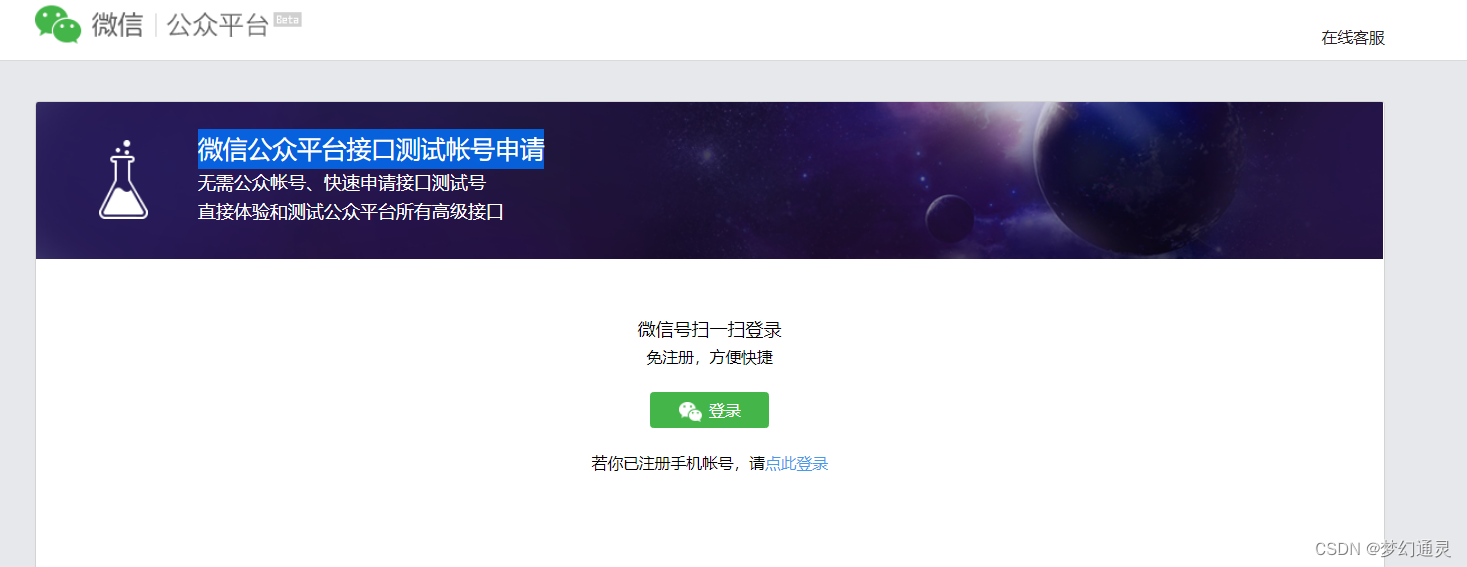
在 微信公众平台接口测试帐号申请 扫码登录,获取测试号信息。
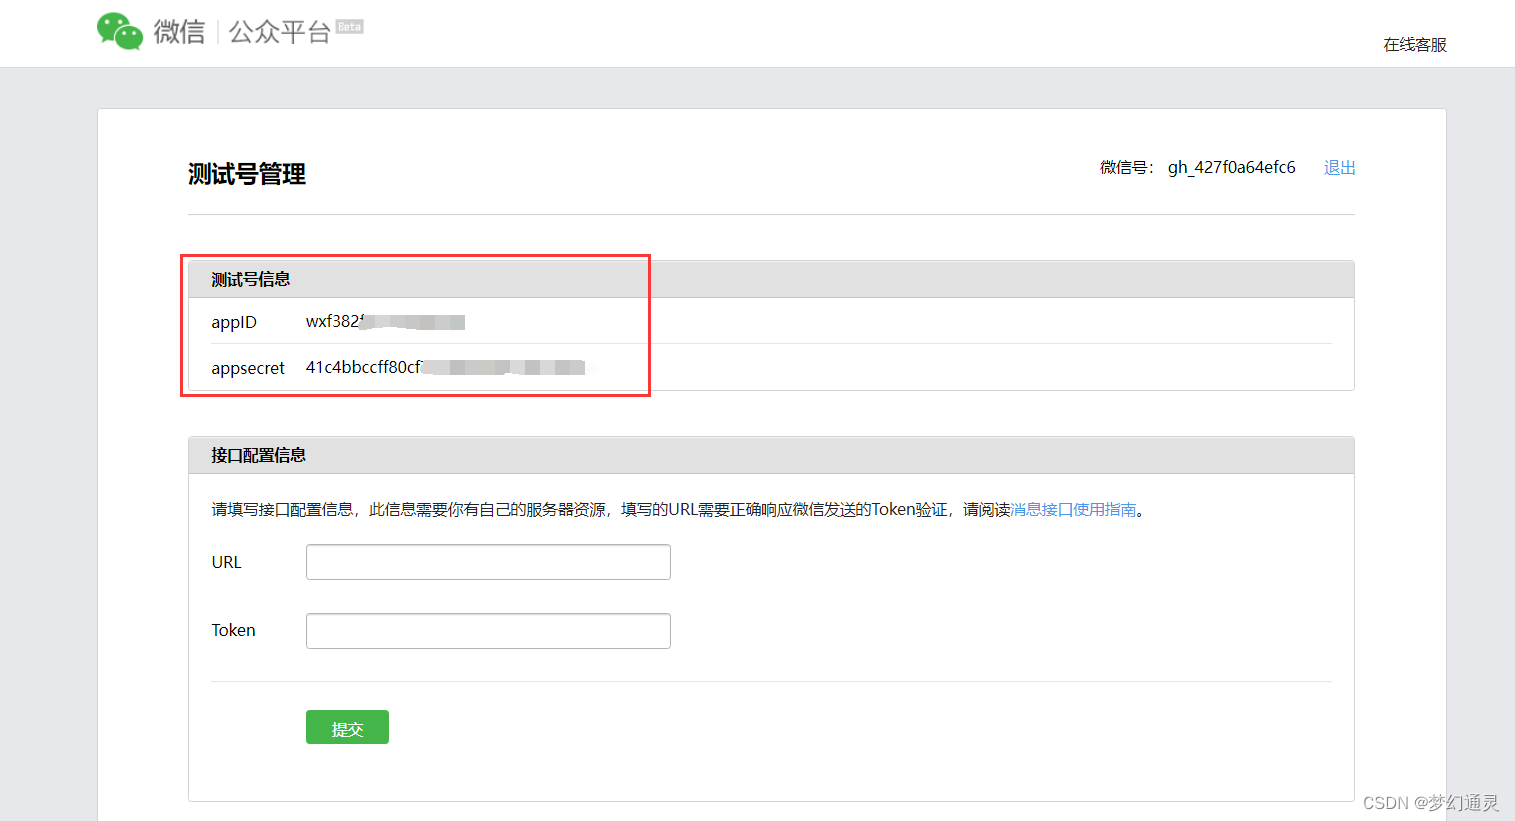
 扫码登录成功,会生成AppId和私钥,即==appID== 和 ==appsecret==。
第二步、设置模板并关注账号
定义微信模板格式信息,可参考以下样式。
今天是{{date.DATA}}
{{remark.DATA}}
{{city.DATA}}的天气: {{weather.DATA}}
最低气温: {{low.DATA}}度
最高气温: {{high.DATA}}度
今天是我们相识的第{{loveDays.DATA}}天
距离您的生日还有{{birthdays.DATA}}天
美句欣赏:{{sentence.DATA}}
添加成功,会生成模板ID,即template

关注测试公众号
用微信扫码关注测试公众号后,会展示微信号,即==userId==,通过userId给用户发送消息。

第三步、创建定位应用
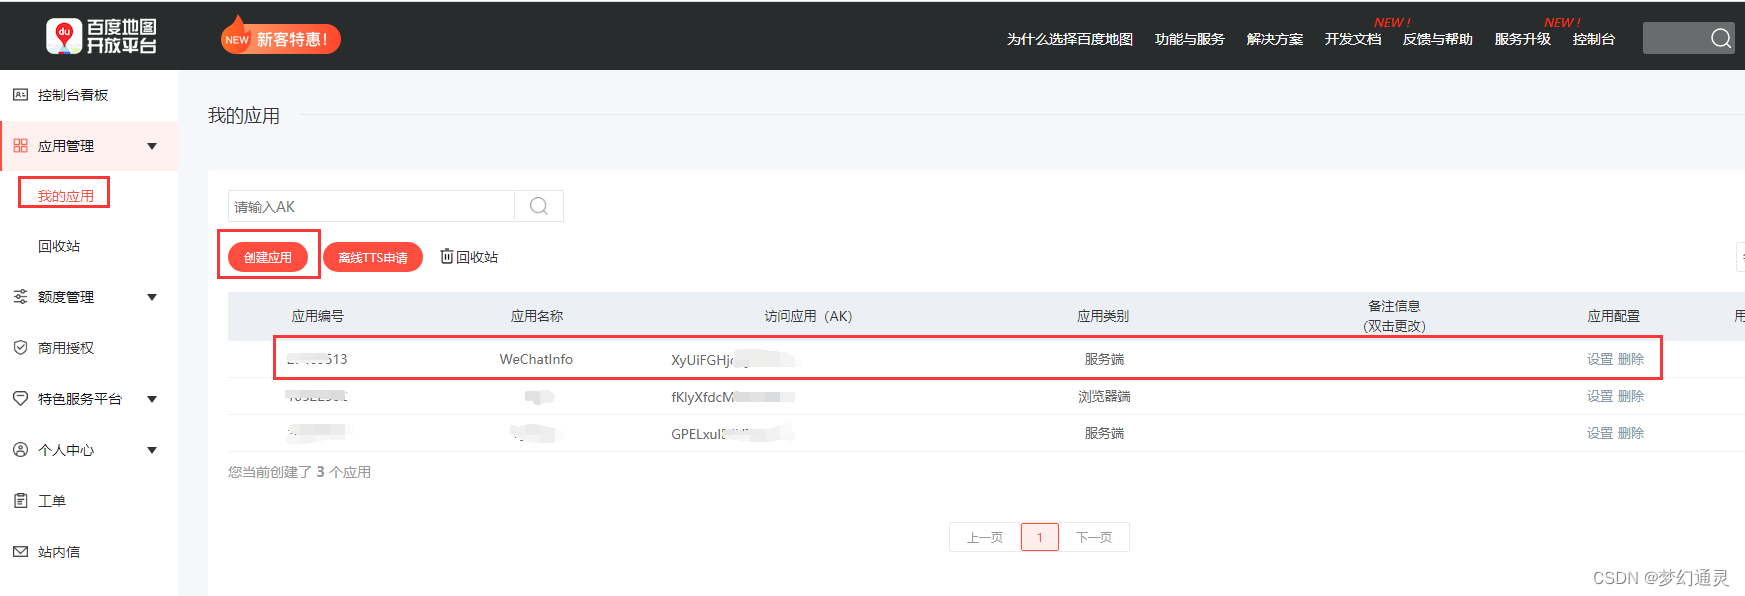
使用百度地图,登录百度地图开放平台,右侧菜单,应用管理->创建应用->服务端。
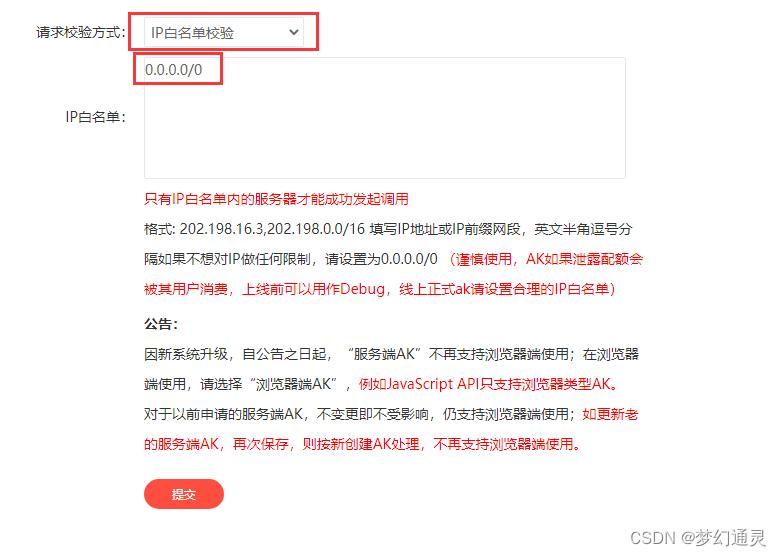
 选择 ==IP白名单校验==,白名单可不拦截,即 0.0.0.0/0,复制生成的 ==AK==。
 在 行政区划文档中查找需要获取地区的行政区划代码(district_id),本次选择区域是河南信阳,即411500。
调用参考代码如下。
public static Weather getWeather() {
        RestTemplate restTemplate = new RestTemplate();
        Map<String, String> map = new HashMap<>();
        map.put("district_id", PushConfigure.getDistrict_id());
        map.put("ak", PushConfigure.getAk());
        String res = restTemplate.getForObject("https://api.map.baidu.com/weather/v1/?district_id={district_id}&data_type=all&ak={ak}", String.class, map);
        JSONObject json = JSONObject.parseObject(res);
        // 判空处理
        if (json == null) {
            return null;
        }
        JSONArray forecasts = json.getJSONObject("result").getJSONArray("forecasts");
        List<Weather> weathers = forecasts.toJavaList(Weather.class);
        Weather weather = weathers.get(0);
        JSONObject now = json.getJSONObject("result").getJSONObject("now");
        JSONObject location = json.getJSONObject("result").getJSONObject("location");
        weather.setText_now(now.getString("text"));
        weather.setTemp(now.getString("temp"));
        weather.setCity(location.getString("city"));
        return weather;
    }
第四步、天行数据-获取精美句子
本次使用的是注册和使用 天行数据官网的免费接口,即免费精美句子接口,每日可免费调用100次。
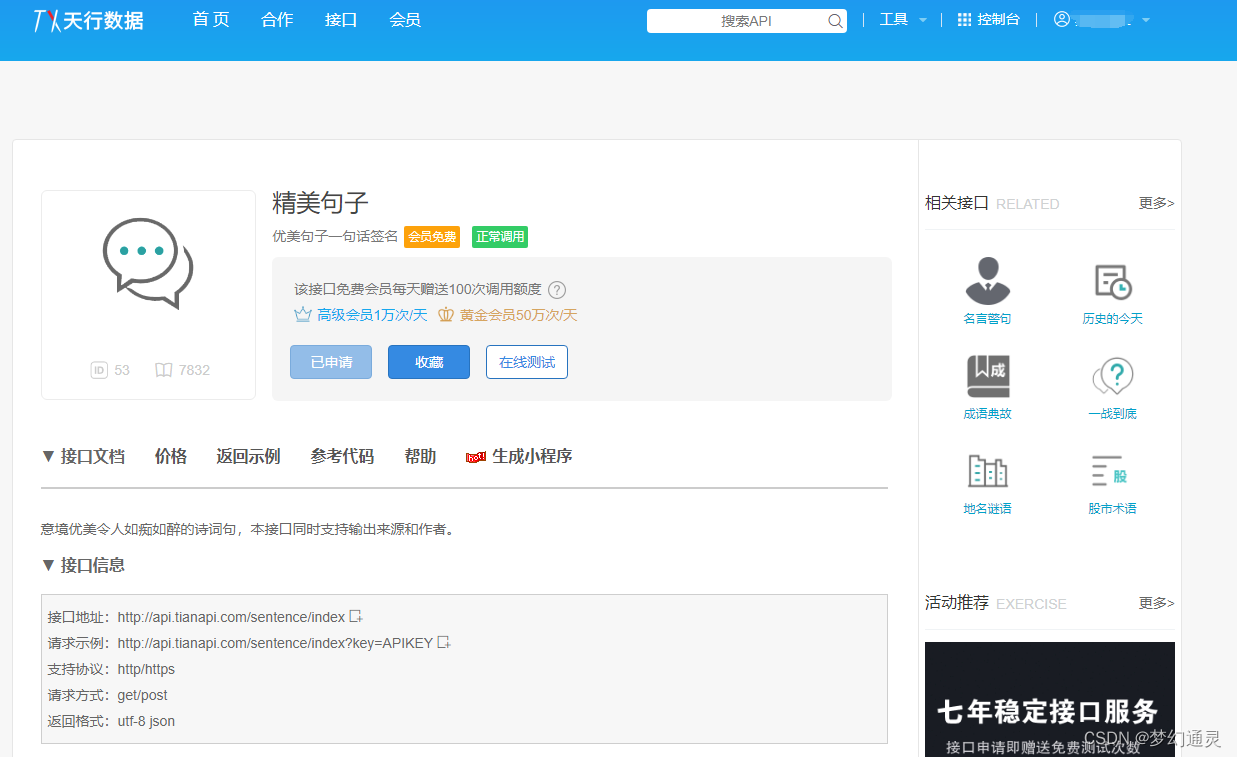 调用参考代码如下。
//java环境中文传值时,需特别注意字符编码问题
String httpUrl = "http://api.tianapi.com/sentence/index?key=你的APIKEY";
String jsonResult = request(httpUrl);
System.out.println(jsonResult);

/**
 * @param urlAll  请求接口
 * @param httpArg  参数
 * @return 返回结果
 */
public static String request(String httpUrl, String httpArg) {
    BufferedReader reader = null;
    String result = null;
    StringBuffer sbf = new StringBuffer();
    httpUrl = httpUrl + "?" + httpArg;

    try {
        URL url = new URL(httpUrl);
        HttpURLConnection connection = (HttpURLConnection) url
                .openConnection();
        connection.setRequestMethod("GET");
        InputStream is = connection.getInputStream();
        reader = new BufferedReader(new InputStreamReader(is, "UTF-8"));
        String strRead = null;
        while ((strRead = reader.readLine()) != null) {
            sbf.append(strRead);
            sbf.append("\r\n");
        }
        reader.close();
        result = sbf.toString();
    } catch (Exception e) {
        e.printStackTrace();
    }
    return result;
}
第五步、模板消息发送
根据定义的模板消息,拼接数据,并发送。核心业务代码如下所示。
private final static APP_ID = "wxf382f5c165******";
private final static APP_SECRET = "41c4bbccff80cf71e29954bc********";
// 关注测试公众号的用户ID
private final static USER_ID = "odq6K5hPvDO9jV5LNpcr********";
// 模板ID
private final static TEMPLATE_ID= "odq6K5hPvDO9jV5LNpcr********";

// 1、拼接微信storage基础数据
WxMpInMemoryConfigStorage wxStorage = new WxMpInMemoryConfigStorage();
wxStorage.setAppId(APP_ID);
wxStorage.setSecret(APP_SECRET);
WxMpService wxMpService = new WxMpServiceImpl();
wxMpService.setWxMpConfigStorage(wxStorage);
// 2、推送消息方法
WxMpTemplateMessage templateMessage = WxMpTemplateMessage.builder()
     .toUser(USER_ID)
     .templateId(TEMPLATE_ID)
      .build();
Weather weather = WeatherUtil.getWeather();
// 3、拼接模板数据
if (weather == null) {
    templateMessage.addData(new WxMpTemplateData("weather", "***", "#00FFFF"));
   } else {
    templateMessage.addData(new WxMpTemplateData("date", weather.getDate() + "  " + weather.getWeek(), "#00BFFF"));
    templateMessage.addData(new WxMpTemplateData("weather", weather.getText_now(), "#00FFFF"));
    templateMessage.addData(new WxMpTemplateData("low", weather.getLow() + "", "#173177"));
    templateMessage.addData(new WxMpTemplateData("high", weather.getHigh() + "", "#FF6347"));
    templateMessage.addData(new WxMpTemplateData("city", weather.getCity() + "", "#173177"));
}

   templateMessage.addData(new WxMpTemplateData("loveDays", "12", "#FF1493"));
   templateMessage.addData(new WxMpTemplateData("birthdays", "30", "#FFA500"));

   String remark = "海到无边天作岸,山登绝顶我为峰! =^_^= ";
   templateMessage.addData(new WxMpTemplateData("remark", remark, "#FF1493"));
   // 调用接口返回美句
   templateMessage.addData(new WxMpTemplateData("sentence", RainbowUtil.getRainbow(), "#FF69B4"));
   System.out.println(templateMessage.toJson());
   try {
        // 4、发送消息
        wxMpService.getTemplateMsgService().sendTemplateMsg(templateMessage);
       } catch (Exception e) {
          System.out.println("推送失败:" + e.getMessage());
            return "微信模板消息推送失败:" + e.getMessage();
       }
        return "微信模板消息推送成功!";
 }
pom 中需要引入微信模板依赖,如下所示。
<dependency>
   <groupId>com.github.binarywang</groupId>
   <artifactId>weixin-java-mp</artifactId>
   <version>3.3.0</version>
</dependency>
推送结果如下图所示。
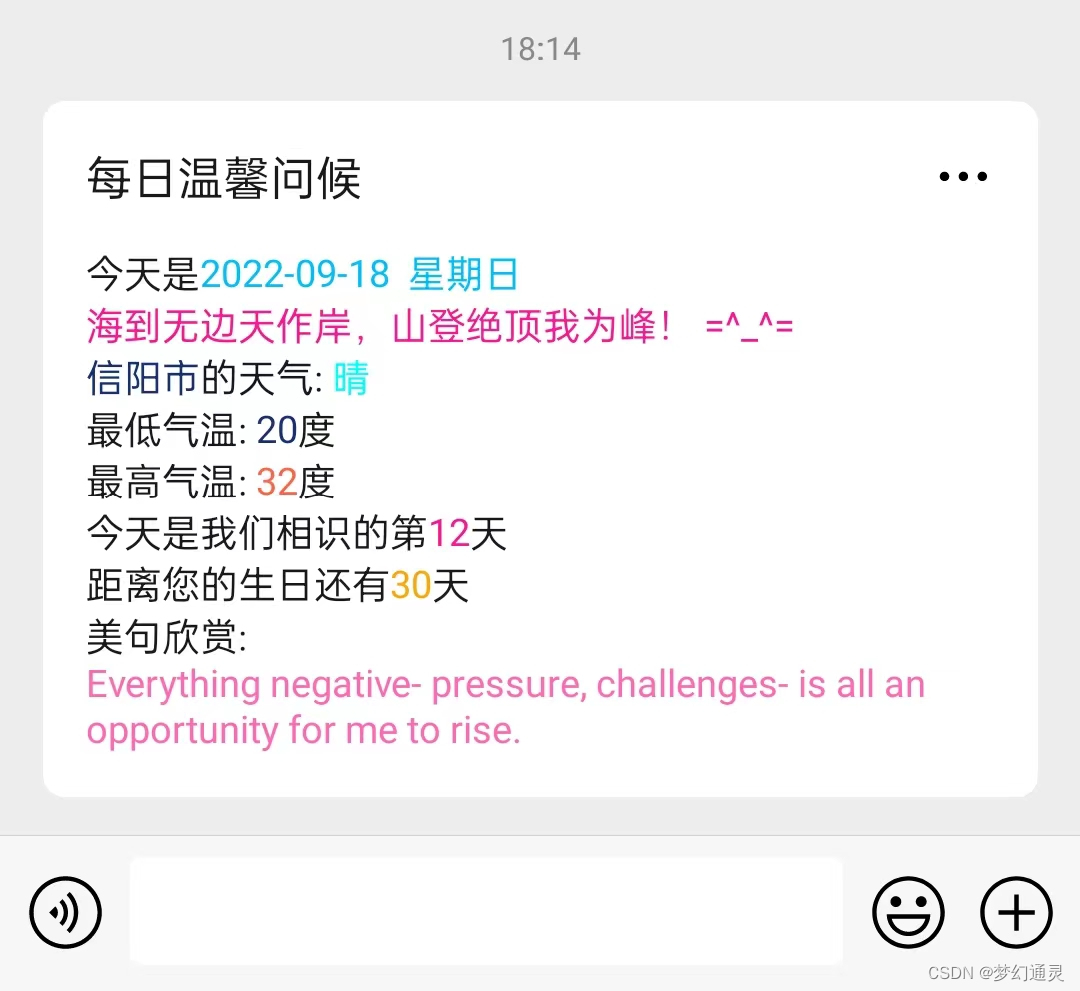 以上是配置和运行的过程,具体可查看参考资料(gitee上有完整可运行的代码)。
参考资料
【1】https://gitee.com/love_c/wechatPush
